
So a couple of weeks ago I shipped a bunch of paintings…some small and some large and learned a few things along the way that I would like to share to maybe save some legwork for my fellow artists out there.
I’d like to be able to say I came up with how to easily build your own box impervious to “poke thru” damage but I must give all the credit to Heather Miller from Charlottetown (check out her amazing work here) who shared her tips on how she ships paintings from P.E.I. where she lives to a Toronto gallery without worrying about the type of damage that shipping in a cardboard box brings or having an expensive heavy wooden crate built for it’s one way trip to a gallery. I have also found some fantastic tips from Laura Den Hertog’s blog here along the same lines using slightly different products, great pics and details to explain everything too….so helpful…also an awesome painter :)…either way will work!
So ….the paintings were signed, sides painted black, hanging hardware attached and wired up…next Marvin my “Quality Assurance” person had to confirm all was ready to ship :)…you can imagine just how “helpful” he was!

Ok…enough monkeying around…. first of all you need to gather your supplies, you will need bubble wrap, cardboard corners to protect your paintings, “Fragile” stickers, Duct tape (get the industrial strength and the 3″..comes in lots of colors :). As you can see I’m using Uline to obtain my supplies…great products and they deliver to your studio within a few days and in large quantities so you will be set for quite a few shipments…you just need to have a bit of storage room for the roll of bubble wrap. If you have some other company that you recommend please comment, they are the best I have found in Canada so far for these supplies. So this next photo here show the paintings all wrapped individually in bubble wrap with the corners attached. You can see that my plan is to have two layers of paintings within one box..the bottom layer is just peeking out here. I put a layer of cardboard between the layers.

The last item you will need is masonite also known as hardboard…I got mine from Home Depot…they come in 4 feet by 8 feet sheets by 1/8″ thick. I needed three sheets @ $ 7.92 each so tax included it cost me $ 26.85. What I was thrilled with is that Home Depot guys will cut these sheets to your specs at no extra charge!!! (…as long as you aren’t annoying about it said the guy ha…when I asked what he meant he said some people come with a long list of cuts to spec for a large project like a gazebo or deck). I think some stores like Lowe’s will charge per cut but it’s still a minimal amount and it’s so easy for them with their huge saw plus it’s easier to get into your vehicle if you don’t have a van or truck.
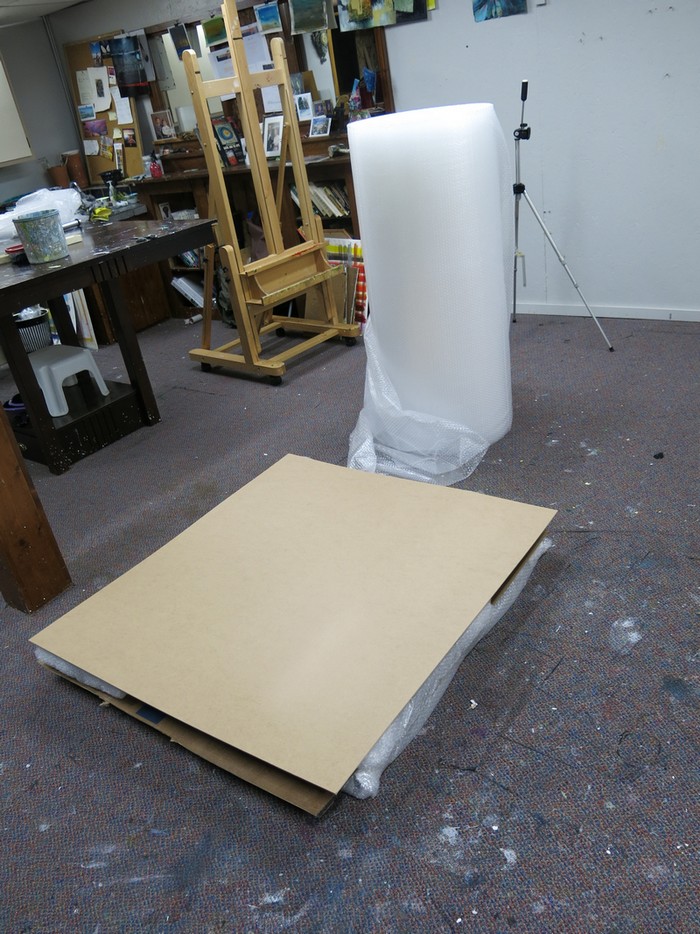
Before I headed to Home Depot I had assembled the paintings on the floor in two layers so I could figure out how wide and long the box would have to be in order to give those measurements to the cutter guy. The next two pics show the two large sides of the soon to be box and then the following are the sides that the Home Depot guy cut for me to use for the smaller sides.

This next pic shows the sides and the bottom layer attached with the duct tape…now it’s starting to look like a box.

Bottom layer with back of the painting facing up. I put cardboard between the layers of paintings in case the wire or hanging hardware wants to rub but if you’ve bubble wrapped each painting that shouldn’t occur…I’m just being nit-picky 🙂

Second layer of paintings (have you ever played Tetrus?)…lay them out so they all fit together then fill any spaces with bubble or air filled bags so they don’t move around in transit.

Time to attach the final side…don’t forget to insert your paperwork for the receiver of your package before you tape it up…this tape really works and is hard to remove if you forget.

So here are the two boxes I made including some home made handles which was much appreciated by the carrier. If it’s easier to handle there is a good chance there will be minimal damage which is the point of all this 🙂 All that is left to do is attach the “Fragile” stickers, shipping labels and weight each box. Then you are ready to call your carrier to pick up your shipment….I used Same Day Worldwide since that is who Heather recommended but there are others out there. In order to give you a quote to pick up and deliver your shipment you will need your box measurements, weight and to/from addresses.

I hope you have found this helpful. Again thank you Heather and Laura 🙂

Great tutorial, thank you Carole. I’ve only shipped items up to 24 x 24 and luckily had an old TV box to adapt for that, but this would certainly work well for bulk items. Thank goodness for duct tape and bubble wrap!
LikeLike
Thank you Sue. All the shipping insurance in the world won’t prevent the heartbreak of a ripped canvas of an original painting. It’s not foolproof but pretty darn close outside of fire, excess water damage or some other major disaster. Months ago I shipped a large painting to Victoria (48″ x 60″) and went the conventional route…wooden crate built and all in it cost the client over $500 in shipping…ridiculous in my opinion! The next time I had to ship a large painting (30″ x 60″) to California the client and I worked out that I would take the painting off the stretcher bars and mail it in a tube…insurance and brokerage fees thru UPS came to over $ 150 not including the packaging and delivery to the nearest UPS store. Of course then upon receipt the client had to arrange for the re-stretching of the painting…doable but a pain. Anyhoo to ship the two boxes that I’m showing in this blog post cost me about $ 110 not including the packaging and was shipped from Ottawa to Charlottetown It took 4 days to get there door to door. Much more reasonable plus I like the whole “no danger of poke thru” in the masonite boxes. They are light so less cost for shipping and handling and that was for 11 paintings for very reasonable cost per painting!
LikeLike